
iLA VAD
Open the Control Panel
Open idolLiveAudio and choose Start iLA VAD in the top bar. You can also open iLA Driver Control Panel from the Start menu.

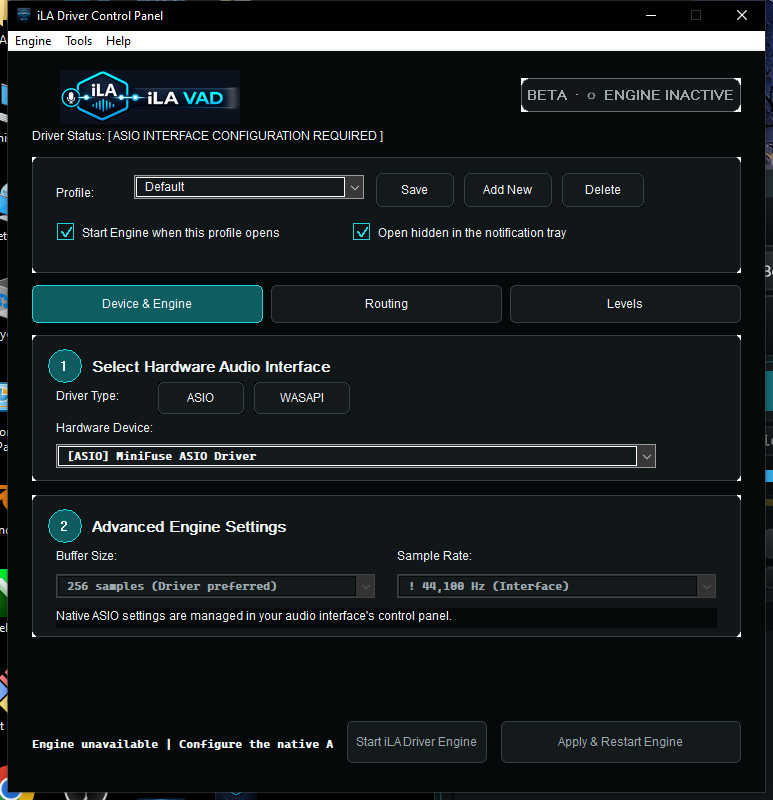
DEVICE & ENGINE
Choose the correct hardware device
- Driver Type. Choose ASIO when your interface has a manufacturer ASIO driver; choose WASAPI for devices without native ASIO.
- Hardware Device. Choose the interface or USB microphone you are actually using.
- Buffer Size. Start at 256 samples for stability. Try 128 only when the PC is comfortable and you need lower latency.
- Sample Rate. 48,000 Hz is a good OBS/TikTok choice, but it must match the interface and streaming app.
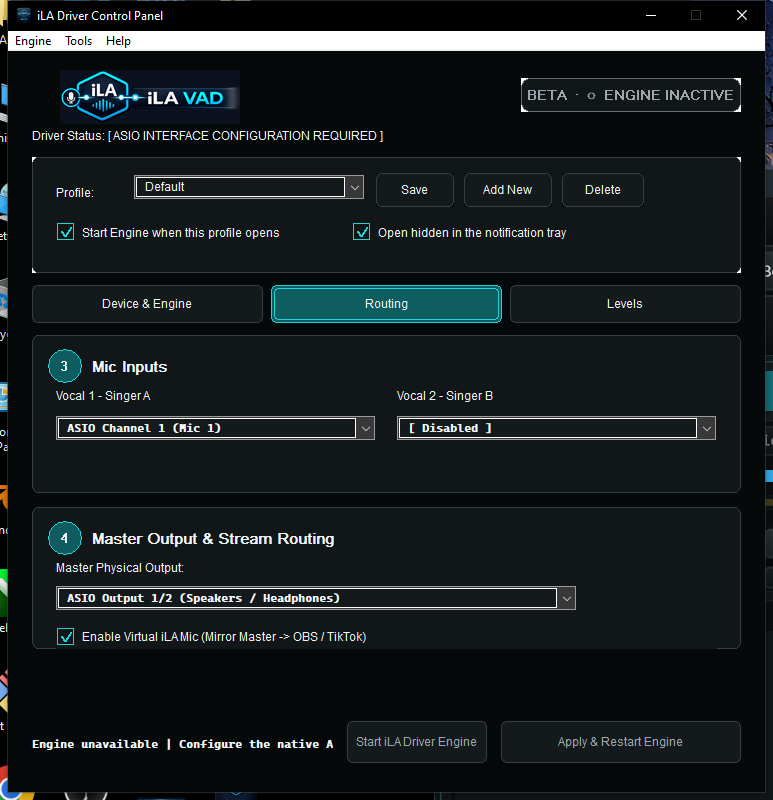
ROUTING
Assign microphones, monitoring, and stream output
- Vocal 1: select the input carrying the main microphone.
- Vocal 2: use only for a second singer/microphone; otherwise leave it Disabled.
- Master Physical Output: choose the output pair feeding your speakers or headphones.
- Enable Virtual iLA Mic: enable this to send the processed Master to OBS/TikTok LIVE Studio.
WINDOWS MUSIC
Send Windows music into idolLiveAudio
In Windows Sound Settings, set the playback device for your music app/browser to iLA Music Send. Music then reaches the Music channel, where its level and plugins stay independent from Vocal.
Play a song and watch the Music meter in idolLiveAudio. If it does not move, check the output device selected by that specific playback app.
idolLiveAudio
Choose iLA Virtual Audio Bridge
Choose Settings, set Audio Device Type to ASIO and Device to iLA Virtual Audio Bridge. Then assign Vocal 1 L (Mono), Music L/R (Stereo), and Master L/R (Stereo) by channel name.
- Sing: the Vocal meter moves without staying red.
- Play music: only the Music meter moves while you are not singing.
- Monitor: the correct speakers/headphones play without a Windows echo loop.
OBS / TIKTOK LIVE STUDIO
Use Virtual iLA Mic as the input
In your streaming app, add a microphone/audio-input source and choose Virtual iLA Mic. Disable or mute old microphone sources so the audience does not hear two copies of the signal.
Do not use Monitor and Output on Virtual iLA Mic if the monitored signal can feed back into the capture path. Use headphones for the first routing test.